NatureBytes Camera Kit Part-II

In Part-I of this series, I introduced the NatureBytes KickStarter project and finally got around to building the kit I ordered in 2015. I want to hack it so I can capture photos/ videos at night. I need to identify what nocturnal animals are exploring my yard overnight.

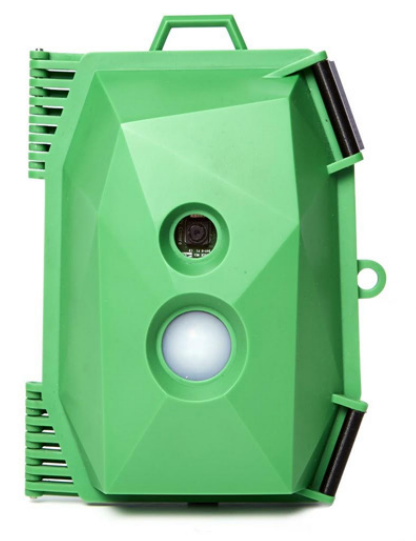
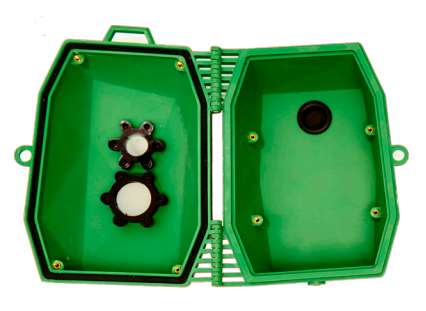
The Camera Kit is simply – Fantastic! Details of the kit and the build instructions can be found here. The first thing that struck me was the quality of the bright green case. This thing is an engineering marvel.

Continue reading

NatureBytes Camera Kit Part-I

On June 24, 2015, a NGO named NatureBytes began a KickStarter campaign to raise money for a wildlife camera kit based on the Raspberry PI. Based in Berkshire UK, west of London, this conservation group set out to encourage kids to get off the couch and explore nature.

Within a month, the campaign raised £34,164 from 303 backers.  This was 108% over the goal of £28,995.  At that time, Ol’ Sopwith was living in London and was one of 50 backers who pledged £85.

It was expected the kits would ship in December of 2015, but there were delays caused by the complicated molding process used in creating the cases. I followed the updates closely because I felt their pain. Anybody who has ever been involved in the injection molding process of plastics knows how difficult this can be.

Continue reading

The AM2315 “How-To” – Updated

As promised, I have updated the AM2315 temperature sensor “How-To” document for modern times. The changes include:

  • The removal of the obsolete quickwire library that caused so much pain.
  • Removing quickwire also removed the dependency on Python3.
  • Added the very capable i2c library tentacle-pi written by lexruee.
  • Use of the Raspian Switch OS means these instructions work on any Pi.
  • Streamlined 6-Step process.

I have tested the new procedures on every Pi that I have in the drawer. This includes a Pi v1, v2, vA+, v3, and the Pi Zero. Yup – they all work using the same software and the same pinout. Sweet!

You can download the new document and test script here.

For all of you that have contacted me in the last couple of months trying to get your sensor working, I apologize for the delay in getting this document updated.

Sopwith

The AM2315 Sensor – Revisited

Hello fellow smoke-breathers. Sorry about the very long absence from my blogging duties.  I intend to be more active now that I no longer travel so much.

Over the last several months I have received some Emails telling me the AM2315 temperature sensor code I wrote long ago no longer works. There are a lot of reasons for this. First, the Google code repository has been taken down and folks are having trouble finding the quick2wire code libraries. They are now posted here.

Second, there were some hardware changes made to the Pi-3 and Pi Zero that broke the sensor detection code in my AM2315.py script. Finally, the use of the quickwire code is difficult due to its size and complexity. There are better i2c code libraries available now.

Since the AM2315 is still a popular hacking sensor, I will plug in an alternative i2c library, test the code on the latest Pi’s, and update the ‘How-To’ document.

Standby for the update – ‘ol Sopwith is working on it.

Sopwith

‘How-To’ Series – More Temp Sensors

There continues to be great interest in hacking weather sensors on the Pi. A while ago I wrote a ‘How-To‘ for the AOSONG AM2315 temperature/humidity sensor that was quite popular. Today I have released another ‘How-To‘ for the AM2315’s siblings – the AM2302, DHT11, and DHT22 sensors.

Temperature/Humidity Sensors

Temperature/Humidity Sensors

I have found that experienced Pi/Linux users can get these sensors up and running in a very short time. For many hackers new to the Pi and or Linux, it is a challenging learning process, sometimes even intimidating. Sopwith’sHow-To‘ series are guides designed to help these folks succeed in their Pi project.

Each ‘How-To‘ includes screen shots for nearly every step of a project. Although this takes some work and makes the documents longer, I have found it is these images that help Pi enthusiasts understand each implementation step.

You can download the ‘How-To‘ below. The Zip file also contains the modified test Python script described in the document.


Post a comment if the ‘How-To‘ Series helps you with your projects. Improvements, edits, bug reports, and requests for other ‘How-To‘ topics are most welcome.

There is a kid out there who would love to help you hack your Pi.

Sopwith

Hacking a BV4618 20×4 LCD (Part-3)

In Part-2 of this blog post series I provided a detailed ‘How-To’ for new users of the  ByVac BV4618 LCD for their Arduino projects. It is clear to me there are plenty of Arduino hobbyists who want to hack LCD’s and need a simple way to wire them up and write to them.

The ByVac BV4618 LCD is a great choice. You can actually get it up and running with three wires – V+, Gnd, and Tx. Writing text to the display is pretty straightforward using the BV4618_S library. The library is useful, but Ol’ Sopwith does not think the class is easy enough to use for beginners.

To solve this problem I extended the BV4618_S class library and created a new class named sop4618_S. The class is brain-dead simple to use and it hides all the complexities of the VT100 code sequences.

Continue reading