
In Part-1 of this blog post series Ol’ Sopwith described the ByVac BV4618 LCD and how to wire it up to an Arduino Uno. If you are interested in how to program an Arduino to talk to this LCD, pull up a chair and let’s get started.
I wrote up a detailed implementation guide for the BV4618 LCD that walks through the entire process to get the LCD into one of your cool Arduino projects. If you are new to the Arduino and want a quick guide on how to setup the developer IDE you can follow this guide.

Arduino ‘How-To’ Series
If you are an experienced Arduino hacker and just want to know how to wire-up an Arduino to the Bv4618 LCD, below is a wiring diagram:
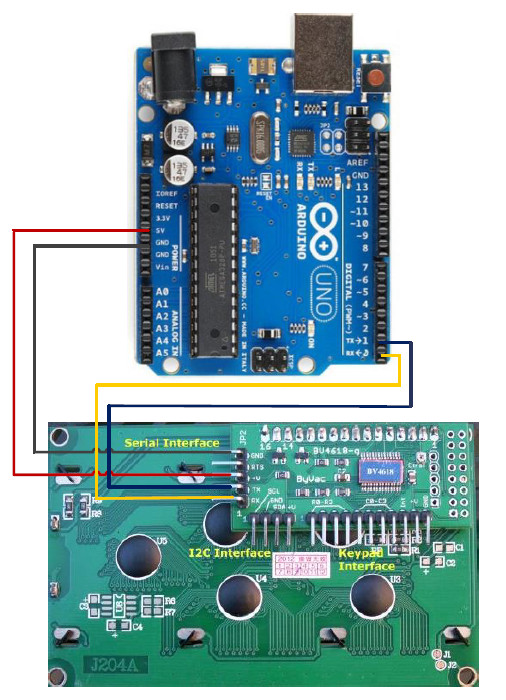
Arduino – BV4618 Wiring
If you only want to write to the LCD and have no desire to read from it – you can eliminate the Rx wire. This means you have a fully functioning 4×20 LCD using three wires. How cool is that? If you do this be sure to occasionally call the flush() function. If you do not do this the communication buffer will overflow and your program will behave erratically.
Here is the link to the ByVac BV4618 datasheet
Here is a link to the ByVac BV4618 Arduino library
Here is the source code to my simple HelloWorld_BV4618 sketch.
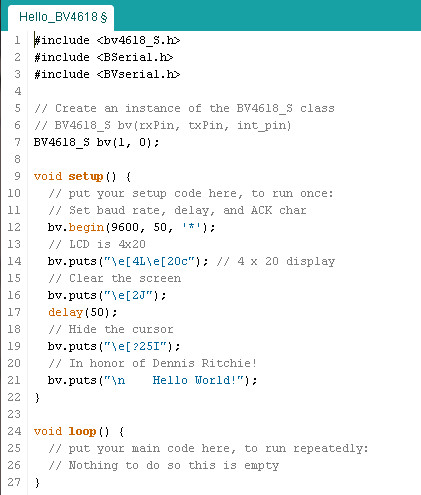
Hello_BV4618 Sketch
You can download the source code by clicking on the above button. The sketch is contained in a text file. Simply rename the .txt extension to .ino and save it in a new sketch folder named Hello_BV4618.
Hack the World!
Sopwith