
In my previous posts in this series (I-III), I added night vision capabilities to the very cool NatureBytes wildlife camera kit. As in all maker projects – improvements had to be made.
Once I placed the night-vision capable camera in the field for testing, I discovered the LISIPAROI IR light board cannot be used in the wild. The device is just not powerful enough. If is fine for close-up work, but outside? Forget it.
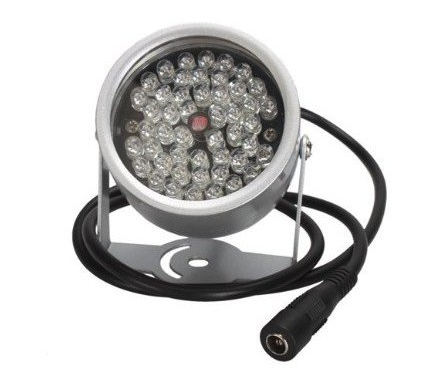
It was time to turn disappointment into action. Plus, if it worked out of the box – what fun is that? Time to get serious. As I searched the web, I discovered weatherproof 12V IR lamps are cheap. These are designed to be used with CCTV cameras, most of which are 12 or 24 VDC powered. I purchased a pair for around $16 USD. The one I chose is made by a company called Phenas.
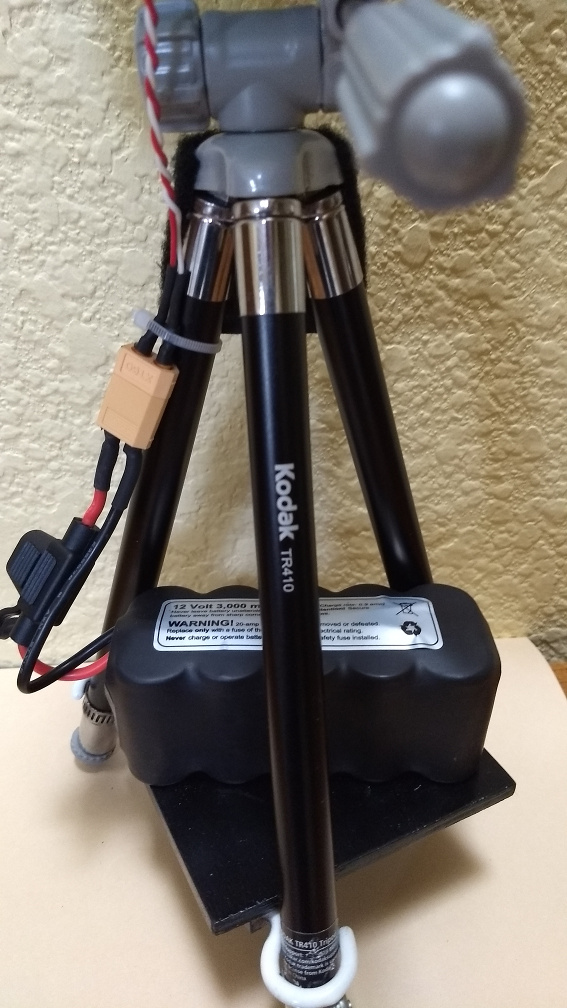
I next needed to figure out how to power this thing. Since it requires 12 VDC, I figured I might as well “go-big.” I found this monster on Ebay.

A 12 VDC 3,000 mAH NiMH battery pack oughta’ lite up the place. Just a reminder here. If you are going to mess around with these types of batteries, you must handle them with care. Not only do they produce a lot of current, you must be very careful in how you charge them. Use due diligence around this stuff please.
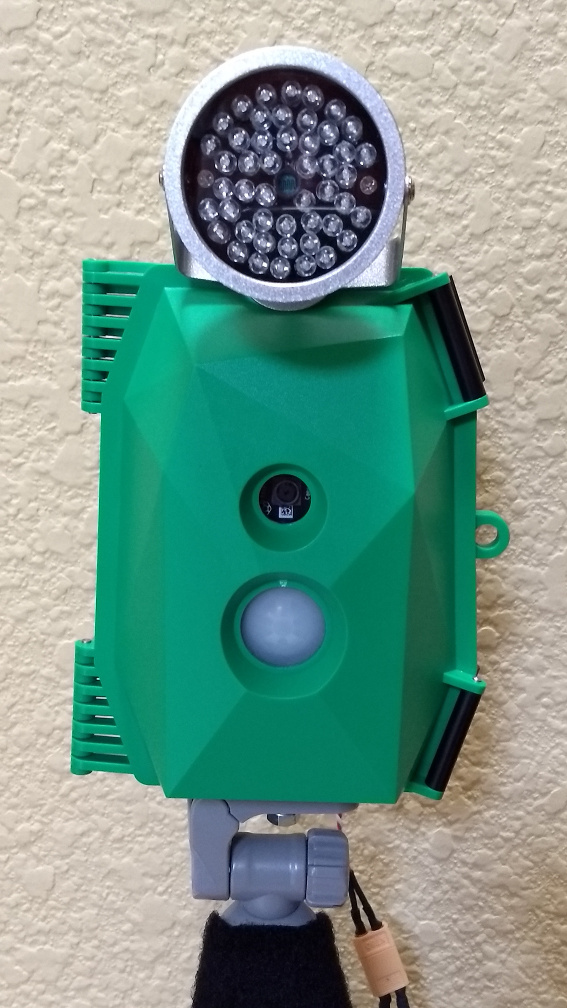
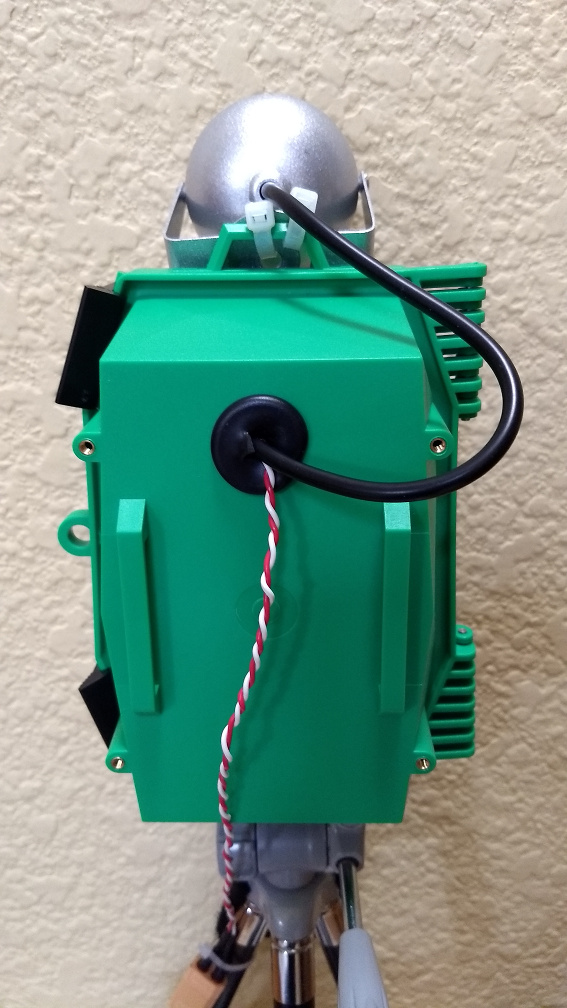
I mounted the IR light assembly on the top of the NatureBytes case using two tie-wraps.
Next, I added a platform to the base of the tripod to act as a battery shelf. I used birch hobby plywood, tea-cup holder rings to attach the shelves to the legs, and small hose clamps to secure the whole assembly. I secured the battery to the shelf using heavy-duty velcro. This allows me to remove it when I need to charge the battery.
Now I had to wire the light assembly to the battery and determine how to turn the lights on and off. Obviously, a relay is just the ticket. There is plenty of room in the NatureBytes case to add the relay.
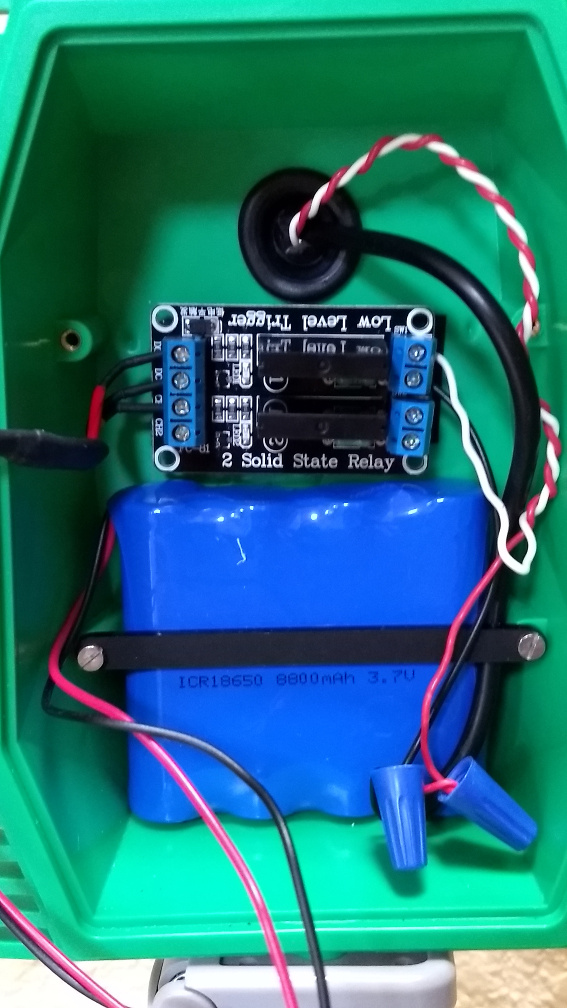
I again used heavy-duty velcro to attach the relay to the back of the case. Wiring this up was a snap. I used the same Pi GPIO pin in the previous light setup to activate the lights. Instead of activating the Lisiparoi light board, the GPIO pin is used to activate the relay. On the active side of the relay I simply connected the ground wire from the light assembly on one lug and the battery ground on the other lug. The IR Led power line is connected directly to the battery hot lead.
Another note here: I had to reverse the pin logic. The Lisiparoi Led board required a logic HIGH to activate the board and a LOW to turn it off. The relay is the opposite. The relay channel is off when the trigger logic is HIGH, and on when it is LOW.
Another feature of the IR Led assembly is the light sensor. It detects the ambient light level and will not activate the Led’s unless is is dark outside. This relieved me of the task of using time-of-day calculations to activate the lights. Very convenient.
Once I got all this wired up – it worked just great. And yes – these lights are very bright. The below photos, taken by my mobile phone, show the huge difference in the two light sources.
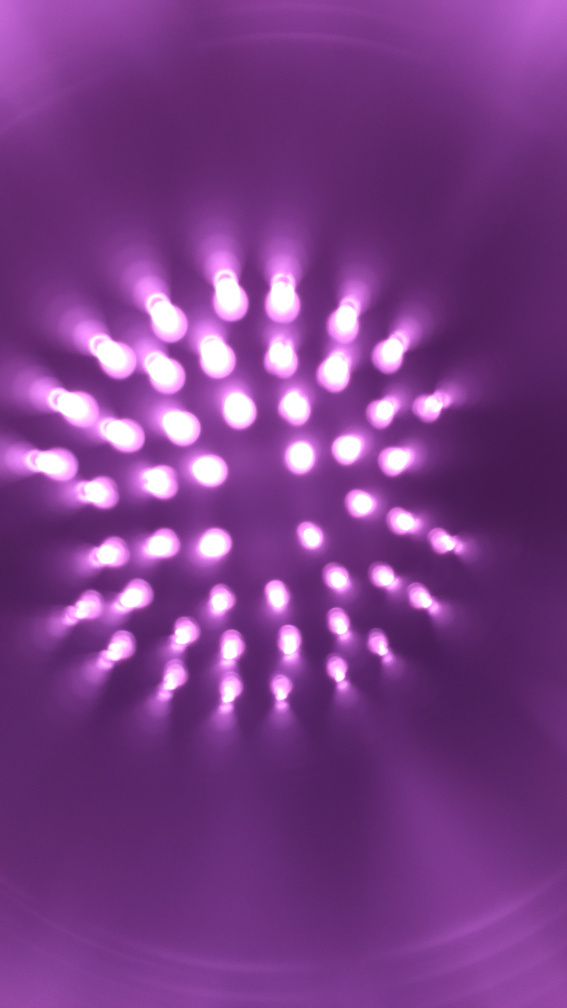
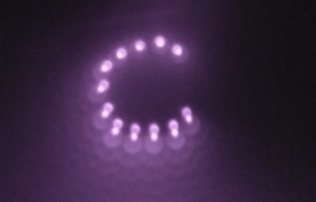
One other thing. The new light setup has two sets of Led’s. The IR Led’s and another set of red Led’s. The red ones are visible to the human eye and are on whenever the IR Led’s are lit. This is nice because you can easily tell if the IR lights are active. Just be aware of this if you are going to use these lights in a project where you do not want to have any visible light showing.
I now am using the camera at night in the field. I will post any interesting photos I capture.
Cheers to the NatureBytes folks for allowing me to have so much fun!
Sopwith