In my recent posts I hacked a BV4618 LCD to prepare it for use in my Tastic RFID project. Now that I have the BV4618 working and an improved and simple code library (sopBV4618_S), we return to the Tastic tool. If you are not familiar with the Bishop Fox Tastic project you can read about it here.
Ol’ Sopwith again wants to make it clear that I am not interested in the dark-side of RFID hacking. Nor do I encourage anyone to do so. The goal of this project is to learn about RFID and how it all works. Fascinating stuff.
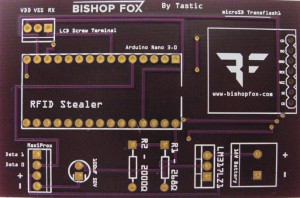
After researching the Tastic RFID documentation I ordered three PCB’s using the Tastic project PCB documents. The vendor I used was OSH Park. Highly recommended outfit that does great work.
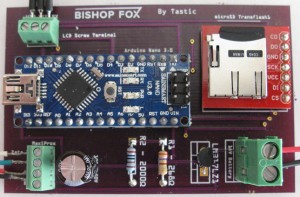
I ordered all the parts in the Tastic project parts list with the exception of the LCD. It was going to be enormously expensive to ship the recommended LCD from Amazon in the USA to my home in London. So I replaced it with the ByVac BV4618 I wrote about in previous posts. Below is a photo of my assembled Tastic board.
Since electronic hacking project processes are serial in nature, I decided to test the SD card circuit first. I fired up the Arduino Nano with a USB cable and wrote a quick sketch to read and write files to the SD card. The test worked great. Now I knew the Nano was wired correctly to the SD card.
I next connected the BV4618 LCD to the three screw terminals on the PCB board labeled ‘LCD Screw Terminal.’ Wiring was a snap. VDD -> LCD GND. VSS -> LCD +V. Rx -> LCD Rx. When I fired up the Nano the LCD jumped to life. The Tastic board is wired to use Pin-4 (D4) for LCD display writing. I wrote a quick ‘Hello World!’ sketch using my sopBV4618_S library and tested it. Worked great. Now I knew the LCD circuit was functioning properly.
Next up – a HID card reader that will read the RFID cards and send the Weigand bits to the Tastic board. I found a HID Thinline II on Ebay from a local seller here in London. Cost me 25 pounds. I also ordered 10 HID Prox II cards to test the setup.
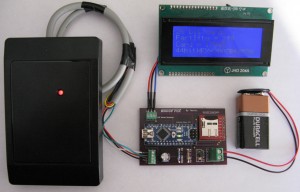
When the card reader arrived I wired it up to the Tastic board. This was also a snap. – -> HID Blk. + -> HID Red. Data-0 -> HID Grn. Data-1 -> HID Wht. I needed an external power source to fire up the HID reader. This source is connected to the PCB at the large block terminal labelled ’18V Battery.’
The original Tastic project used a long-range card reader that required high voltage for a long antenna reach. The HID Thinline II can operate on 5-16 VDC so I decided to use a single 9V battery to power up the rig. You can see the complete rig up and running in the below photo.
Now that the rig was up and running, I had to make some slight changes to the Tastic project Arduino code. The changes were to the LCD display code because I was using a different LCD. I tested the code changes and ensured it all worked without smoke.
When I passed a card over the reader it beeped and the card was read successfully. You can see the LCD display below.
The final test was to ensure the read card data was written to the SD card. I read all 10 of my Prox cards and then pulled the SD card to read from my laptop. Sure enough, all the captured card data was written to the card.
I now have a working Tastic RFID tool to conduct additional experiments. This was a fun project and I learned a lot. As I continue my research, I am going to focus on the HID iClass proximity cards. Stay tuned.
Sopwith


Anybody know where can I buy modified BishopFox?
HI!
can you tell me where I can buy the PSB Tastic?
Thank you!
As stated in my post, you can download the PCB design docs here:
http://www.bishopfox.com/download/817
You can then upload them to a PCB printing factory. I used these guys and was very happy with the quality:
https://oshpark.com/
Sopwith
you did a grat job, i love this project.
i stuck also at the LCD changes. is it possible to have a look in your Tastic RFID arduino code?
I am making this project too, but i am having issues with LCD because lcd is without serial controller. So bought same controller as you.
Could you please send me code changes what you made to get the lcd working?
Hi, would you be able to show the changes you made to your code so we can see how you got it working please?
Hi John,
Sorry about the delay in responding. I am not sure what code changes you are looking for. Let me know and I will send it to you.
Sopwith