
In Part-I of this series, I introduced the NatureBytes KickStarter project and finally got around to building the kit I ordered in 2015. I want to hack it so I can capture photos/ videos at night. I need to identify what nocturnal animals are exploring my yard overnight.
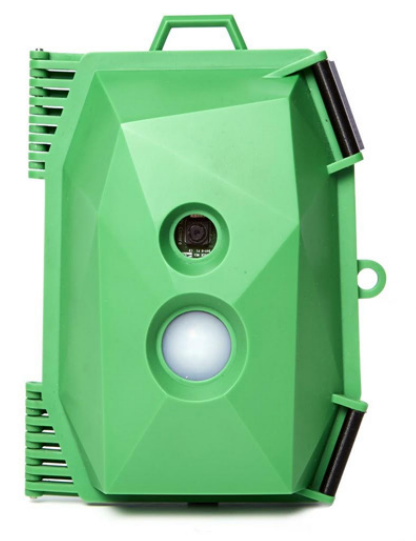
The Camera Kit is simply – Fantastic! Details of the kit and the build instructions can be found here. The first thing that struck me was the quality of the bright green case. This thing is an engineering marvel.
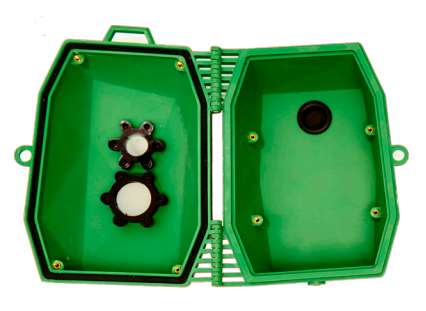
I followed the instructions closely and quickly assembled the kit in about 20 minutes. I used an A+ Pi to power the kit. The A+ has always been one of my favorites because of its simplicity and low power consumption. The A+ is now nearly obsolete since the Pi Zero has the same specs in a much smaller form factor. I also installed a Pi NoIR V2 camera board since I need it to take night photos.
In addition to the fantastic case, here some other observations:
- The assembly instructions were written for noobs and kids and includes lots of graphics and photos. First rate work here.
- The battery pack is a monstrous 4 cell, 3.7 volts @8800 ma of current. The claim is this battery will power an A+ with camera for 4 days and take more than 5200 photos. If true – this is mighty impressive.
- The kit includes a real-time clock. It is very compact and slides right on GPIO pins at the edge of the Pi. This is a terrific addition to the kit and it works great.
- The quality of the case and components cannot be overstated. Somebody worked hard to make this kit within nano meters of perfection.
The only real concern I have about the kit is controlling the internal temperature and humidity inside the case. The case is completely sealed and certified to be waterproof. This is great to keep out the elements, but it also means there is no air circulating about meaning changes in the external temperature will cause condensation inside the case.
Perhaps one of my hacks along the way will be to add a temperature sensor to monitor this issue.
Once my kit was assembled, I moved on to testing it. Instead of using the legacy Raspian OS installed on the SD card that came with the kit, I downloaded the latest version of Pixel that is modified for the camera kit. I burned the image to the SD card and the A+ booted right up.
Another great thing about this kit is the inclusion of test scripts that can be found right on the desktop. There are two test scripts; one to test the IR motion sensor, and the other to test the camera setup.
When I ran both scripts – they both failed. Great. The thing was broken right out of the box! Now the fun began.
I remembered a note on the NatureBytes website advising they changed the GPIO pin in the latest OS release from Pin 11 to Pin 13. This was done because it was difficult to use Pin 11 when it is so close to the real-time clock device.
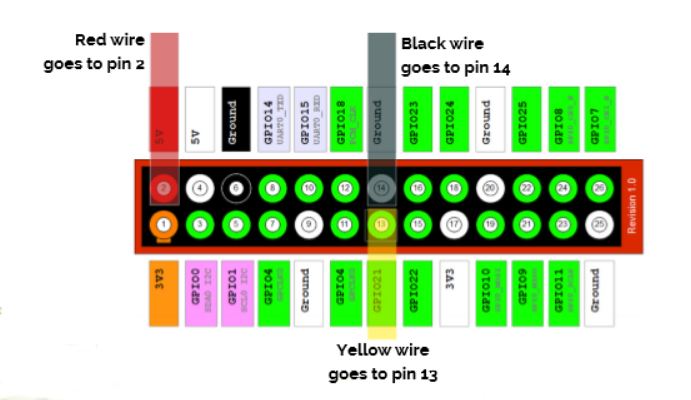
Sure enough, I had the IR sensor yellow lead on Pin 11 since I was following the legacy assembly instructions. I moved the lead to Pin 13 and tried the IR motion sensor test script again. Boom! it worked. Now I knew the motion sensor was working fine.
I tried the camera test script again and it failed. This was expected since the camera is “hard-wired” to the A+ with a cable and has nothing to do with GPIO pins. I immediately suspected I did not have the camera module enabled. I fired up raspi-config and, sure enough, the camera module was not enabled. I fixed that, and while I was in raspi-config, I changed the keyboard layout, local language, timezone, wireless country, and enabled SSH. I love you Brits but trying to use a UK keyboard layout on a US keyboard is sheer torture.
This took care of the camera problem. The test script fired right up and started taking photos. Wow! The kit was complete and working. I set the kit aside while it charged the battery pack. The instructions say this will take up to 18 hours, and they were not kidding. It took a long time to charge the monster battery pack. This is fine with me because I prefer to charge batteries slowly to prevent them from overheating and shortening their life.
One other thing I wanted to do was get the camera mounted on a tripod. I found a portable and cheap one made by Kodak at a local computer store. It was in the mark-down basket for $11 USD. Even though it was the perfect size, its mounting screw was a 3/8″-16 and the threaded nut on the bottom of the kit case is is a M6-1.00.
I carefully removed the cir-clip holding the 3/8″ screw/knob and replaced it with an M6 1.0 purchased at a local hardware store. The result is shown in the photo below.
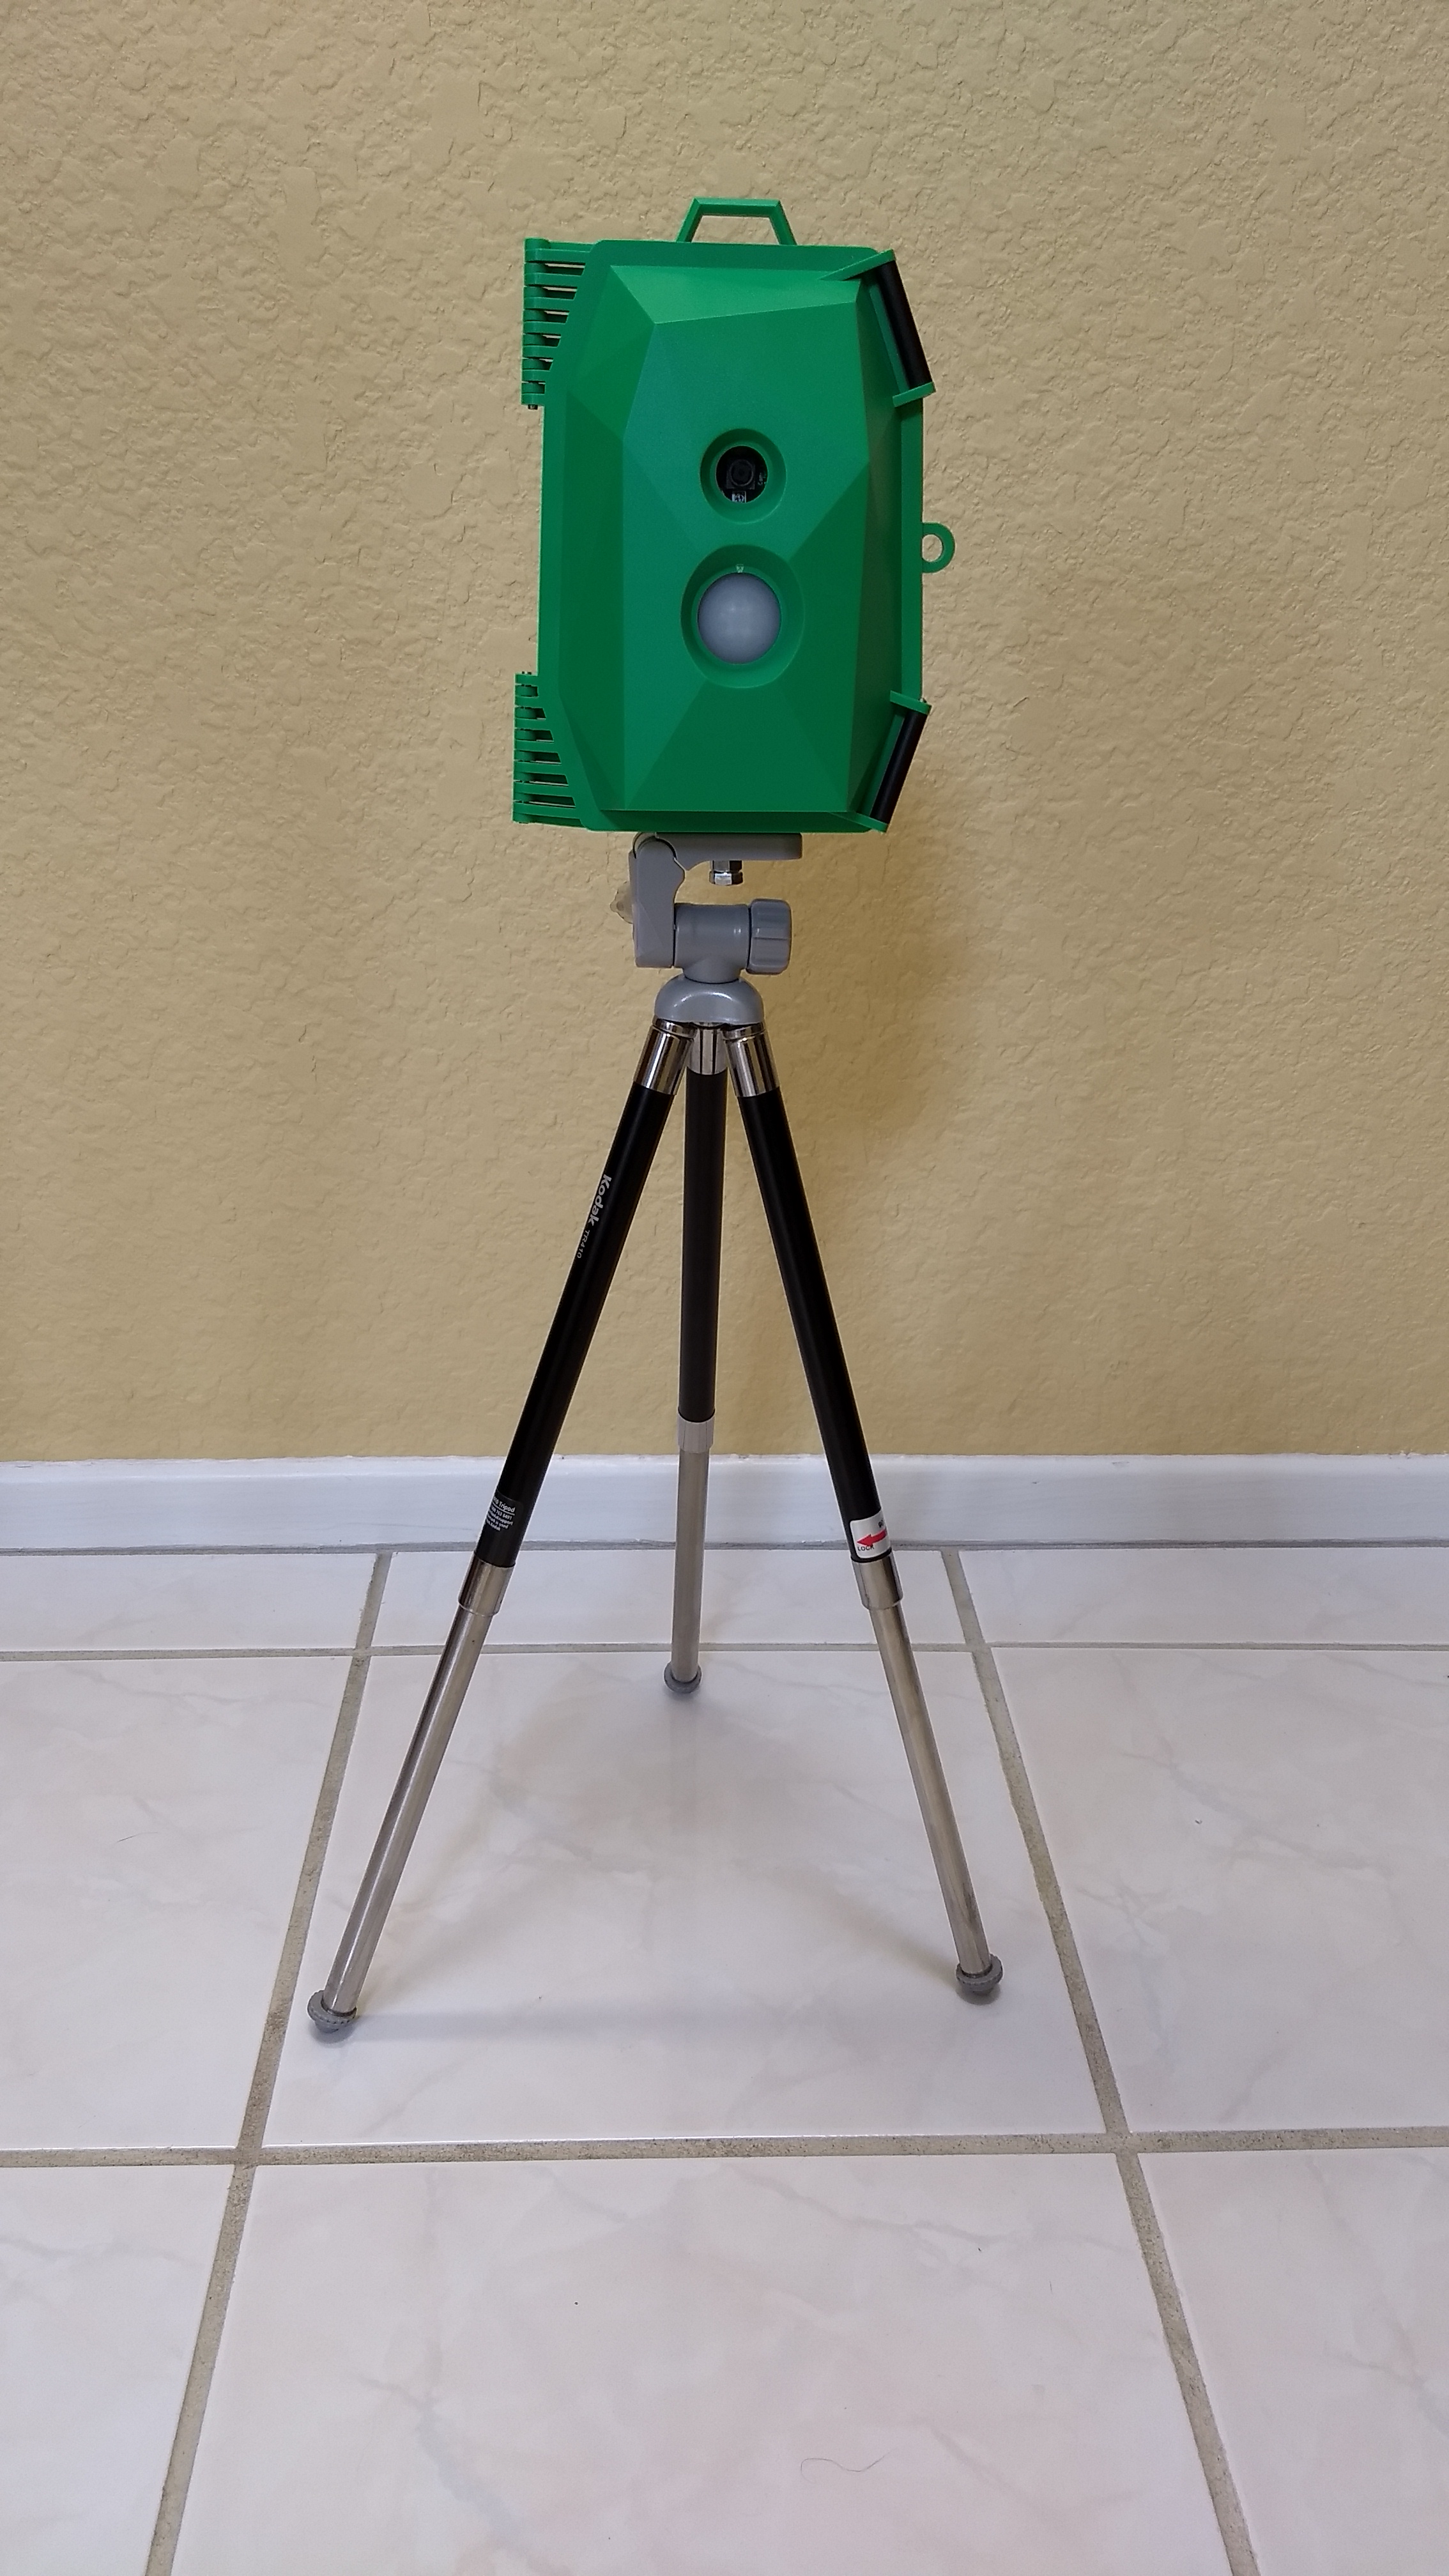
What is great about this setup is that I can tilt/swivel the camera in any direction, plus I can extend the legs of the tripod to a full 42″.
There is only one thing left to do. Hack the kit to take pictures at night in the dark. To accomplish this, I will need to rig up some way to turn on infrared lights just before the camera takes a picture. The daylight sequence of events is:
- Wait until the IR motion sensor detects movement.
- Take a photo.
- Reset the IR motion sensor.
- GoTo 1.
The sequence we will need to capture night photos is:
- Wait until the IR motion sensor detects movement.
- Turn on infrared lights.
- Take a photo.
- Turn off infrared lights.
- Reset the IR motion sensor.
- GoTo 1.
I found a really neat IR light board named LISIPAROI. They have both a white light and IR light version. I ordered one from Allied Electronics here in the US for $15.42 USD. The board is designed to encircle a Pi camera which provides a very convenient mounting platform.

The challenge here is that I cannot mount this board inside the case for obvious reasons. The lights must be exposed. My plan is to do a true hack and mount the board on the outside of the case somehow and wire it to the Pi.
When the IR led board arrives, I will continue this series. Stay tuned.
Sopwith
Pingback: NatureBytes Camera Kit Part-III | Electronic Adventures with Sopwith