Heltec Lora CubeCell Fun – Part 2

In Part-1 of this post I explored my attempt to get a LoRa gateway (RAK Wireless 2247) and end node (Heltec LoRa CubeCell) connected to TheThingsNetwork (TTN). After two days of deep  ‘funstration’ , I was about to give up. But ‘Ole Sopwith NEVER gives up. Up, over, or around – this experiment was going to work.

Many Makers at this point would strongly believe they were sold bum hardware. You know the drill, “When in doubt – blame the hardware.”  I do not subscribe to this theory. In all my years of Making, I cannot recall the last time I was shipped a Maker device that was DOA. Yes, it happens, but it is very, very, very rare. The QC in modern factories is excellent, and if something does not work out of the box, I blame the hardware last.

My problem was how to tell if the CubeCell connection problem was the CubeCell or the gateway – or both.

I spent a lot of time messing around with the devEui, appEui, and appKey arrays. Lots of documentation and videos suggest if your device does not connect, you should reverse the array entries to account for endian differences in the transport layer.

In fact, the TTN configuration page has a handy reversing capability that makes copying the entries in either order. Changing the endian order did not fix the issue.

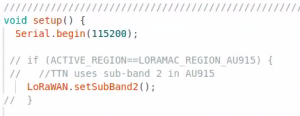
As i continued to review the source code of the Heltec SendReceive.ino example app, I saw this code in the Setup() function:

Continue reading

Heltec Lora CubeCell Fun – Part 1

I have recently been researching and doing some Making with LoRa devices. My main interest in this technology is for home automation and remote weather information. LoRa is an ideal solution here for three reasons:

  1.  The devices are relatively cheap, but they have doubled in price in the last year.
  2. The range of the devices is incredible – miles not feet.
  3. They are super low-power, meaning a battery can last for months or even years.

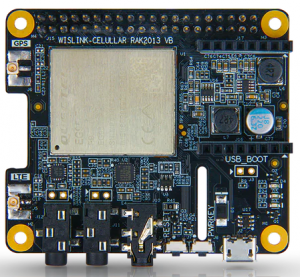
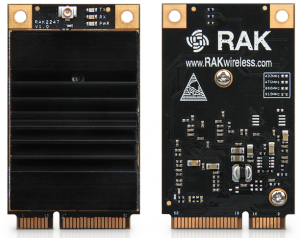
The first thing I did was build a LoRaWan gateway. I used a Rak2247 Gateway Concentrator with the matching Pi Hat.

RAK Pi Hat

RAK 2247


After mounting the rig atop a Pi3B+, I was able to get the device connected to TheThingsNetwork (TTN) without any trouble. The RAKWireless documentation is very good for this device.

Continue reading

SkyWeather2 Issue Resolved

As noted in previous posts, the latest version of SwitchDoc Labs SkyWeather2  software release (May 7, 2022 – Version 027.6) broke my installation script. The problem involved updates to the MySQL database schemas.

New releases of the SkyWeather2 software are updates. This means there is an assumption that you have a working installation of a previous version. My installation script starts from a clean Pi OS and installs all software and dependencies from scratch.

This has not been a problem historically, but the latest SkyWeather2 update makes changes to the existing database schemas, and assumes the databases exist.  To correct this problem, I need to be able to create the databases before running the update scripts.

SwitchDoc Labs support has been terrific in helping me fix this issue. I was provided access to all of the information (e.g detailed database schemas) I needed to get my install script working again.

You can find the latest version of the install script here. It is recommended you install SkyWeather2 software on a Pi running the 32-bit Buster version of Pi OS.

It is interesting to note, my install script runs fine on the 32-bit Bullseye version of Pi OS with legacy camera support enabled. This is not officially supported but those of you that like to live on the edge can hack around and report any issues.

Thanks again to the great folks at SwichDoc Labs for supporting me in getting this issue resolved.

SkyWeather2 Version 27.6 Issue

On May 7, 2022, SwitchDocLabs released Version 27.6 of their SkyWeather2 software suite. A few days later, I was notified by a user that my SkyWeather2 install script failed.

pi@skyweather2:~/SDL_Pi_Skyweather2 $ sudo mysql -u root -p <  WeatherSenseWireless.sql
Enter password:
ERROR 1046 (3D000) at line 5: No database selected

This error was not caused by my script.  It is caused by an error in the SkyWeather2 SQL scripts.

A couple of years ago, I bought a SkyWeather2 system but did not purchase the software SDCard. I was not willing to pay an additional $35 on top of the cost of the system. I soon discovered downloading the SkyWeather2 software on Github and running the main Python script does not work.

Continue reading

Zabbix Agent User-Parameters

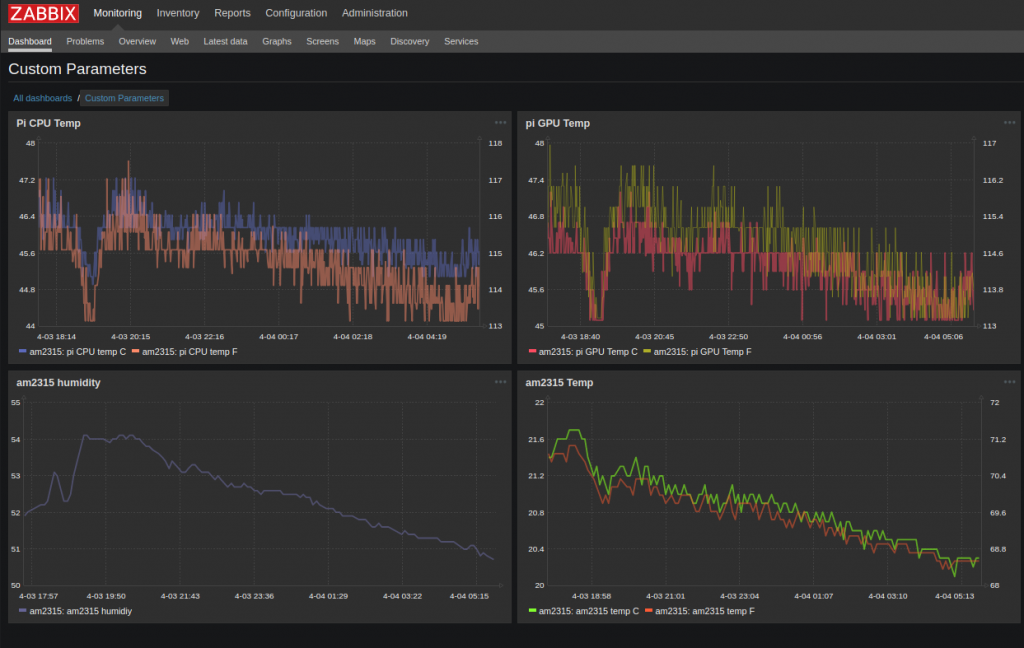
This is part three of the ‘How-To‘ series on leveraging the Zabbix IT monitoring platform using a Raspberry Pi. Part-1 showed how to install the Zabbix server on a Pi. Part-2 showed how to get the Zabbix agent running on a Pi. In this post, I show how to graph the CPU and GPU temperature of a Pi and the temperature/humidity readings from a precision AM2315 temperature sensor.

The Zabbix platform is incredibly flexible. It allows nearly endless possibilities of tracking and graphing data using custom User-Parameters. This is very useful to Makers since it allows the monitoring of sensor data on custom dashboards.

You can download the ‘How-To’ document here. I have also provided a zip file containing the custom scripts and agent configuration user parameter section on the downloads page.

Let me know how you use the Zabbix platform with your Pi fleet to monitor and track sensor data.

AM2315 Update

Hello to all my smoke-eating Maker friends. O’l Sopwith has a story to tell. In my February 1st post, I posted the pure Python source code and updated the implementation documentation for the ever-so-popular AM2315 temperature sensor.

I did this after receiving an Email from a fellow Maker who wanted to know why my sample AM2315 code did not work with Python3. The day after I published that blog entry, a comment was posted stating they could not get their sensor working. The AM2315 was visible in the i2cdetect test, but it would not return any data. The Python code crashed and burned.

About a week of communicating back-and-forth to troubleshoot the problem, this is what we did:

  • Turned on Debug mode in the python script
  • Made sure the device was wired correctly
  • Made sure the correct software was installed
  • Disconnected all other devices from the Pi
  • Ran the SwitchDoc Labs test script (same stack trace)
  • Ensured the Pi had a 2.0 amp power supply

About the same time this was going on, the mate who asked about the Python3 port downloaded and tested the new code. He could not get it to work either. Thinking he had a bad sensor, he set up a test harness and tested his sensor on an Arduino. It worked fine. After some fiddling around, he determined the MAXREADATTEMPT = 3 on line 23 was too small a value. He changed it to 10, and his sensor worked fine.

Continue reading

AM2315 Implementation Doc Update

After more than 5 years, I still get an occasional Email from Makers who ask questions about the Aosong AM2315 temperature/humidity sensor. I got one this week asking why my AM2315 python code did not work with Python3.

This nudged me to take a look at my code and figure out what it would take to get it to work with Python3. Next thing you know, I decided to remove the underlying dependency on any C code libraries and ensure my sample Python code works in both Python2.7 and Python3 without modifications.

To do this, I rely on two Python modules. The first is the great code written by our friends over at Adafruit. They have created a Rapsberry Pi GPIO code module written in pure Python. The second module is from the innovative folks over at SwitchDoc Labs.

I have updated the AM2315 Implementation Guide with the new changes. I also modified the SwitchDoc code so that it will work with Python3.

Now it is time for a rant. If you are a Python programmer, it is time for you to get serious about Python3 if you are still clinging to your Python2.7 worldview. All new code you write should be written in Python3. Python2.7 has an End Of Life date on January 1, 2020. There is a lot of 2.7 code out there that will work in Python3 with just a few changes. In fact, the only changes I made to get the SwitchDoc code to work was putting parenthesis around the print statements. EOR. (End of Rant)

You can download the updated implementation document with a code sample here. Thanks to Adafruit and SwitchDoc Labs for being a part of the Open Source community.

Home Automation Hacking Part-II

In Part-1 of this hacking series, I set the stage for an adventure in home automation hacking. My goal is to start small, grow a system over time, and share the experience.

To follow along on my openHAB adventure, instead of creating an enormous blog entry, I decided to document it in a PDF ‘How-To’ document. I have found these types of documents are highly valuable to those folks that are new to the Raspberry Pi and Linux, and/or those who have little programming experience. Download the PDF and configuration files below:


Here in Part-II, we explore my adventures with openHAB.

To learn more about openHAB, read Part-I of this series or head over to their web site. I started knowing nothing about openHAB, so I spent a lot if time in the documentation. Next, I burned an image of openHABian and fired it up on a Raspberry Pi 3.

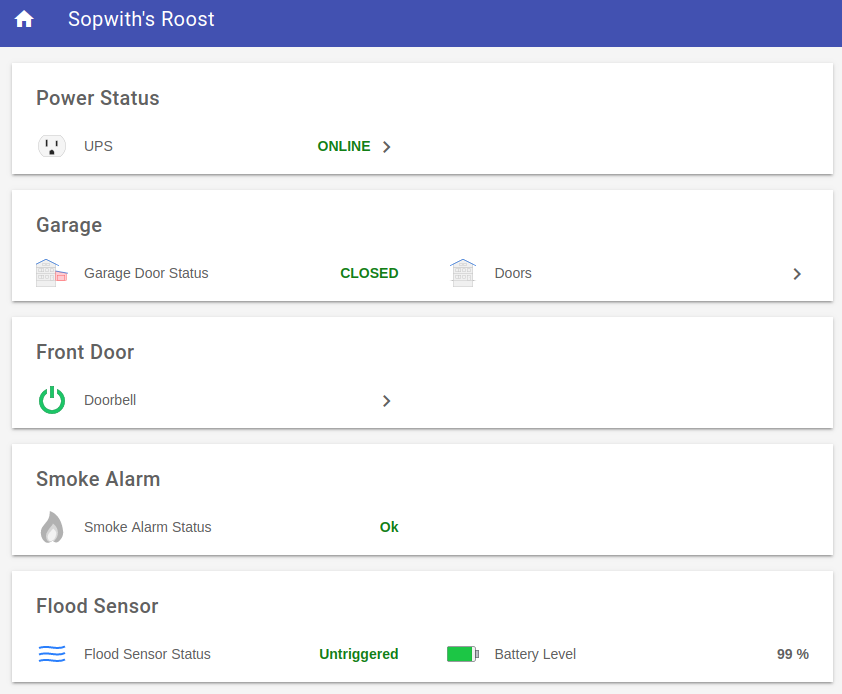
In a couple of weeks of study and hacking, I have a working home automation system that is quite cool. Below is a view of my openHAB system as seen in a browser.

Continue reading

NatureBytes Camera Kit Part-III

In Part-I and Part-II of this blog series, I assembled the terrific NatureBytes Camera Kit and mounted it on a tripod.  I had to wait for parts to arrive before I could add night-vision to the kit. This blog post shows how I modified the camera kit so it can see in the dark.

The goal was to somehow mount and power the LISIPAROI IR light board while still maintaining the weather-proof integrity of the NatureBytes camera kit. The night-vision hack turned out to be pretty simple.

I found a small plastic box with a latching lid in the office supply aisle at a local Wal-Mart. It was designed to store paper clips on a desk, but Ol’ Sopwith had other ideas. The box was the perfect size to install a battery pack, trigger wire and IR light board. Continue reading