SkyWeather2 Gmail Configuration

There are a log of Gmail users getting an unexpected surprise from Google if they use their Gmail password in other applications (Outlook, Thunderbird, etc.) These apps no longer work.

This is due to a security change Google is rolling out. Google now requires 2-Step Verification is activated and all ‘less secure’ apps must use an App password instead of a Gmail password.

Despite the surprise, this is a good security practice. I am all for it.

If you have your SkyWeather2 systems’ Email notification service configured with your Gmail password, these emails will be rejected by the Gmail servers. To fix this, you need to configure an App password for your SkyWeather2 system.

Fear not! I wrote up a ‘How-To’ document that walks through the process. It is pretty painless and only takes a few minutes.

You can find the document here.

Sopwith

SkyWeather2 Issue Resolved

As noted in previous posts, the latest version of SwitchDoc Labs SkyWeather2  software release (May 7, 2022 – Version 027.6) broke my installation script. The problem involved updates to the MySQL database schemas.

New releases of the SkyWeather2 software are updates. This means there is an assumption that you have a working installation of a previous version. My installation script starts from a clean Pi OS and installs all software and dependencies from scratch.

This has not been a problem historically, but the latest SkyWeather2 update makes changes to the existing database schemas, and assumes the databases exist.  To correct this problem, I need to be able to create the databases before running the update scripts.

SwitchDoc Labs support has been terrific in helping me fix this issue. I was provided access to all of the information (e.g detailed database schemas) I needed to get my install script working again.

You can find the latest version of the install script here. It is recommended you install SkyWeather2 software on a Pi running the 32-bit Buster version of Pi OS.

It is interesting to note, my install script runs fine on the 32-bit Bullseye version of Pi OS with legacy camera support enabled. This is not officially supported but those of you that like to live on the edge can hack around and report any issues.

Thanks again to the great folks at SwichDoc Labs for supporting me in getting this issue resolved.

SkyWeather2 Version 27.6 Issue

On May 7, 2022, SwitchDocLabs released Version 27.6 of their SkyWeather2 software suite. A few days later, I was notified by a user that my SkyWeather2 install script failed.

pi@skyweather2:~/SDL_Pi_Skyweather2 $ sudo mysql -u root -p <  WeatherSenseWireless.sql
Enter password:
ERROR 1046 (3D000) at line 5: No database selected

This error was not caused by my script.  It is caused by an error in the SkyWeather2 SQL scripts.

A couple of years ago, I bought a SkyWeather2 system but did not purchase the software SDCard. I was not willing to pay an additional $35 on top of the cost of the system. I soon discovered downloading the SkyWeather2 software on Github and running the main Python script does not work.

Continue reading

SkyWeather2 Installation Guide

In a previous post, I raved about the SwitchDoc Labs SkyWeather2 KickStarter project. When you purchase the kit, there is an option to buy an SD Card with all the required software installed. I passed on it, and cloned the SkyWeather2 software from Github.

To get it all working, I had to sort through all of the dependencies. This took time.

As far as I know, there is no documentation anywhere that describes how to get the SkyWeather2 system up and running from scratch. So – Ol’ Sopwith decided to do something about it.

I created a bash script that installs all of the required application and Python module dependencies. In addition, I wrote a detailed 18 page “How-To” guide.

Hopefully, this makes it easier to get your SkyWeather2 up and running if you choose the DIY route.

Sopwith

Create a Custom PI OS Image

Anyone who has ever messed with a Raspberry Pi knows the drill. You download the latest Pi OS release image and burn it to an SD Card. Then you slide the card into the Pi and power it up. The Pi boots, you login with the default credentials, and you run ‘sudo rasp-config’.

You configure your WiFi access point, locale, keyboard, and timezone. You enable SSH, I2C, Camera, and whatever else you need for IO. Next, you run ‘sudo apt update’, ‘sudo apt upgrade’, and reboot. Finally, you log back in and install all your favorite software that is not installed on the base image (p7zip, pip, i2ctools, midnight commander, etc.)

For casual Pi users, this is a one-time or rare task. For experienced Makers who have gone through this drill dozens, if not hundreds of times – it is a real pain. For Makers who write lots of code and/or software installation scripts, this process is beyond irritating.

Continue reading

SwitchDoc Labs SkyWeather2

My good comrade John Shovic over at SwitchDoc Labs has been very busy. As you may know, John is a high-energy, fun loving Maker, who specializes in designing electronic components and DIY kits for the Raspberry Pi. He is a very talented electronic engineer and educator. All of his projects are open sourced.

I was one of 151 backers who supported his SkyWeather2 KickStarter project late last year. SkyWeather2 is a major upgrade to the original SkyWeather project. I received the kit a couple of weeks ago, and finally found time to assemble it.

SkyWeather2 WeatherRack Sensor Array

The SkyWeather2 system uses a 433MHz radio signal to transmit sensor data. This is the same radio band used in garage door openers, remote control devices, baby monitors, etc. The kit comes with an SDR USB dongle receiver with an antenna. This captures sensor data from the WeatherRack and the indoor temperature/humidity sensor included in the kit.

Since I purchased the kit version, I had to 3D print the base unit components and purchase some additional hardware (screws, O-rings, standoffs, etc.). I also had to figure out how to install the required software because I did not want to take the ‘easy’ route by purchasing the already configured SD Card.

My SkyWeather2 system is up and running and it works great. I will have more to say about this unique, useful, and fun gadget. Stay tuned.


Announcing Release of BTFClock

Greetings smoke-eaters. It has been a while since ol’ Sopwith published a blog post. That is because I have been working hard on another clock project.

For those of you who do not want to read the rest of this post, here is the datasheet.

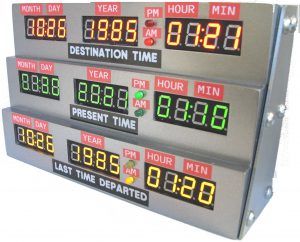
A while ago, I came across a very cool Thingiverse project by a French Maker comrade named jeje95. He created a replica of the time-circuit in the Delorean filmed in the classic movie Back to the Future.  Certainly one of the best movies ever produced, with a near cult-like following to this day.

jeje95 also produced a pretty funny video of his creation, that I highly recommend you watch.

I produced one of these clocks, and as all Makers are obligated to do, I decided to make it better. I ditched the Arduino for a Raspberry Pi Zero, added a much better real-time hardware clock (RTC), and a whole lot more.

Continue reading

A Visit with Dr. SwitchDoc Labs – John Shovic

I had the great fortune to spend a long Memorial Day weekend in Coeur d’Alene, ID. Anytime I am on the move, I like to check out whom of my acquaintances live in the area so I can buy them a cup of coffee.

On this trip, I struck pay dirt! Dr. John Shovic, the founder of SwitchDoc Labs lives there. I first “met” John virtually, way back in the early Pi days when he wrote for the brand new PiMag.

He wrote a series of articles about his adventures building a Pi based weather station and mounting it on a Ham radio tower in the remote Caribbean island of Curacao. I was fascinated with his story and followed it closely. Only John would be crazy enough to come with this idea – and then act on it.

For those who are interested in reading his articles, I have included the download links to the magazines below:

John was kind enough to meet me at the beautiful Coeur d’Alene Innovation Den and show me around. John has his robotics lab here and he spends most of his time with his students from the University of Idaho where he teaches. Many of you know John by following his endless projects and innovations at SwitchDoc Labs and his many KickStarter projects.

What a privilege it was for me to be able to spend time with this brilliant, fun, and laid-back man. As I was flying back home thinking about my great holiday, I kept trying to figure out how I was going to keep up with John and all of his cool Maker projects.

I will have more to say about John in future blog posts.

Sopwith

Airplane Fun Revisited


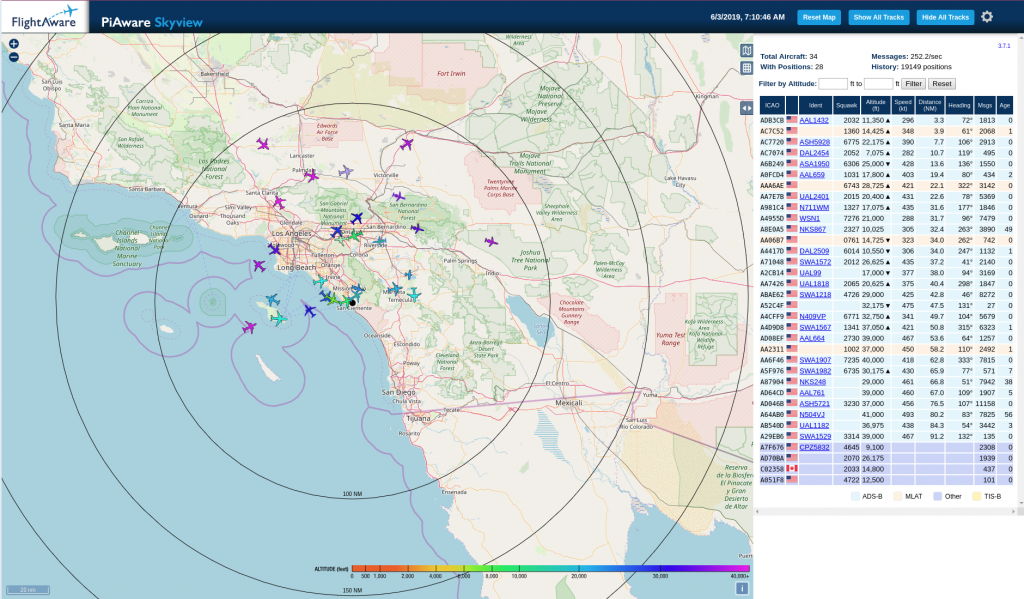
A very long time ago I wrote a blog about tracking airplanes. I was living in London at the time very near London City airport. That project was a lot of fun, so I hacked together another Pi setup to track airplanes here in the Los Angeles area.

I decided to install PiAware and provide my tracker feed to FlightAware. Why? Because if you do, you are given an Enterprise level account (value – $89 USD/month). I fly a lot and use the FlightAware app on my Android phone all the time. It is so easy to track my inbound airplane when I am waiting for a flight.

FlightAware has detailed instructions on how to build a PiAware setup.

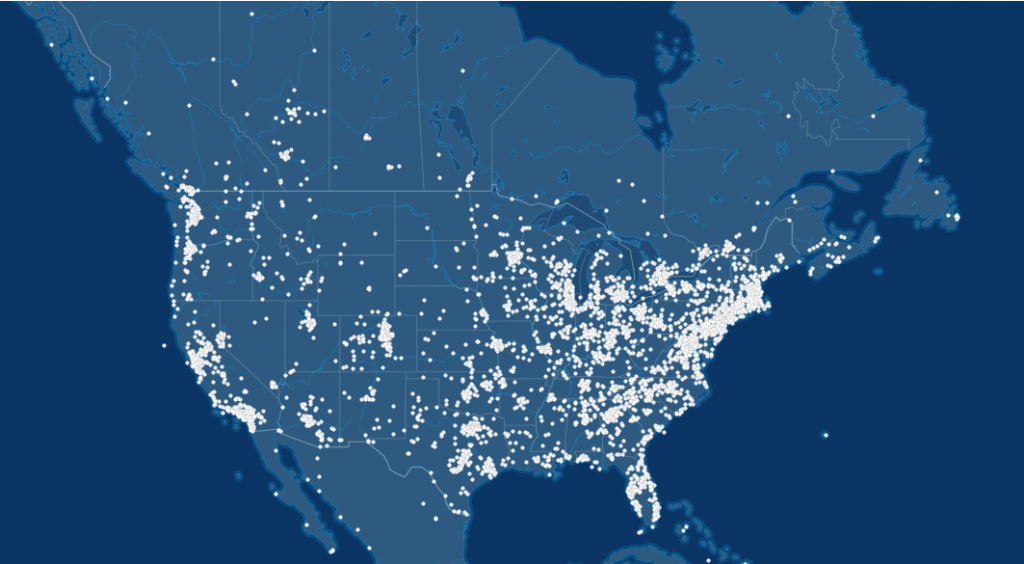
The below image from FlightAware’s web site  shows how many other Makers have blazed this trail before me. That is a lot of Raspberry Pi’s folks.

For my setup I used the below components:

  1. Raspberry Pi3 B+
  2. Pi case with cooling fan
  3. RTL-SDR UBS dongle (This is what receives the radio signals from the antenna)
  4. An extended range WiFi adapter (USB)
  5. A FlightAware optimized antenna

Putting it all together was a snap. To install the software, follow the detailed instructions on the FlightAware web site.

Continue reading