Zabbix Server on a Raspberry Pi

I received an interesting Email last week from someone who wanted to know if I knew how to monitor an AM2315 temperature sensor attached to a Raspberry Pi using a Zabbix server.

My response? Ummm… What is Zabbix? After some brief research, I was introduced to another stellar open-source project with terrific documentation.

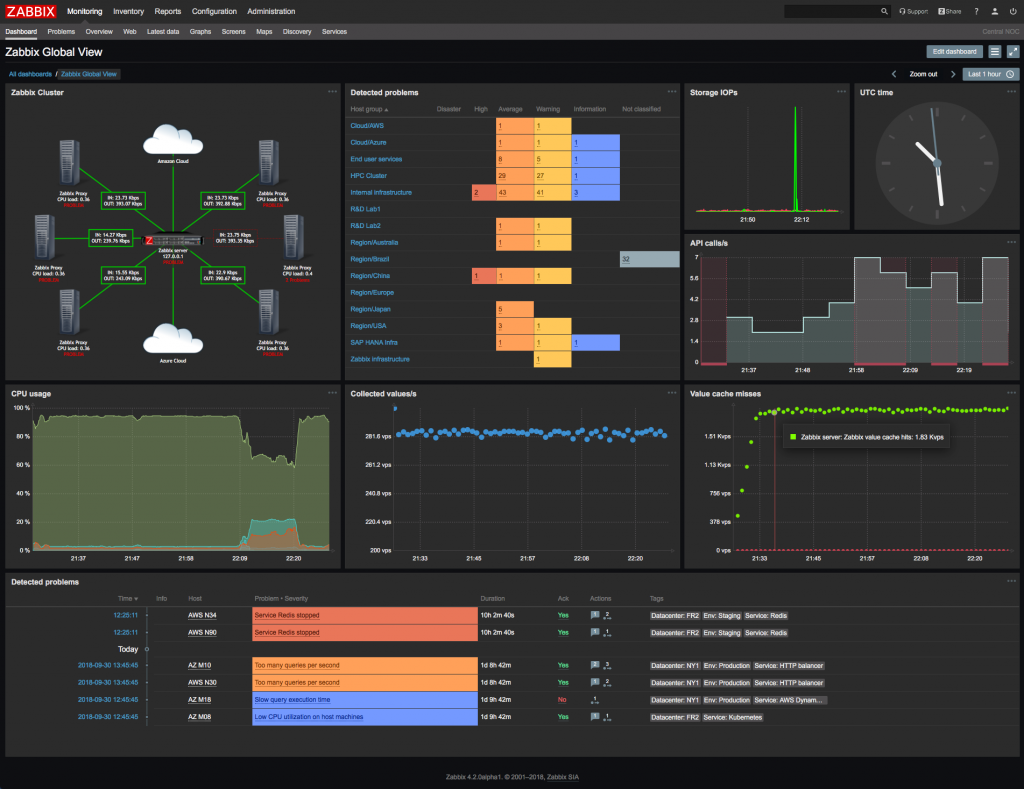
Zabbix is a platform used by IT professionals all over the world to monitor their infrastructure. The platform consists of a server component and a deployable agent that runs on nearly anything. The agent is used to report back to the server performance metrics such as memory, disk, CPU utilization, and a boatload of other metrics. All in a beautiful and configurable dashboard.

The Zabbix system is very flexible and allows the creation of custom agent commands that allow you to configure and monitor any platform.

I was so intrigued by this newly discovered gem, I downloaded and installed it on a Raspberry Pi3. I have written a ‘How-To’ document that walks through the process.

In upcoming posts I will show how cool this platform really is. In fact, I will even show how to report temperature sensor and other data to a Zabbix server.

Pi Real-Time Clock ‘How-To’

For Makers that need an accurate clock for their projects, the Raspberry Pi does not have one. In order to save costs and board space, a hardware clock is missing in all versions of the Pi. Fear not. There are many options available if you need an on-board clock for a project.

DS3221 RTC

I have written a ‘How-To‘ document that walks through the details of getting a real-time clock (RTC) up and running on a Raspberry PI. I know there are plenty of resources on the Web that show how to do this, but I like to take the extra time to write a complete document, not just a list of bullet points.

Makers that are new to the Raspberry Pi and its SBC brethren appreciate having the screen-shots that make it easier to follow along. As long as my ‘How-To’s’ help beginner or intermediate Makers create cool things, I will continue to write documentation.

You can download the ‘How-To here.

AM2315 Update

Hello to all my smoke-eating Maker friends. O’l Sopwith has a story to tell. In my February 1st post, I posted the pure Python source code and updated the implementation documentation for the ever-so-popular AM2315 temperature sensor.

I did this after receiving an Email from a fellow Maker who wanted to know why my sample AM2315 code did not work with Python3. The day after I published that blog entry, a comment was posted stating they could not get their sensor working. The AM2315 was visible in the i2cdetect test, but it would not return any data. The Python code crashed and burned.

About a week of communicating back-and-forth to troubleshoot the problem, this is what we did:

  • Turned on Debug mode in the python script
  • Made sure the device was wired correctly
  • Made sure the correct software was installed
  • Disconnected all other devices from the Pi
  • Ran the SwitchDoc Labs test script (same stack trace)
  • Ensured the Pi had a 2.0 amp power supply

About the same time this was going on, the mate who asked about the Python3 port downloaded and tested the new code. He could not get it to work either. Thinking he had a bad sensor, he set up a test harness and tested his sensor on an Arduino. It worked fine. After some fiddling around, he determined the MAXREADATTEMPT = 3 on line 23 was too small a value. He changed it to 10, and his sensor worked fine.

Continue reading

AM2315 Implementation Doc Update

After more than 5 years, I still get an occasional Email from Makers who ask questions about the Aosong AM2315 temperature/humidity sensor. I got one this week asking why my AM2315 python code did not work with Python3.

This nudged me to take a look at my code and figure out what it would take to get it to work with Python3. Next thing you know, I decided to remove the underlying dependency on any C code libraries and ensure my sample Python code works in both Python2.7 and Python3 without modifications.

To do this, I rely on two Python modules. The first is the great code written by our friends over at Adafruit. They have created a Rapsberry Pi GPIO code module written in pure Python. The second module is from the innovative folks over at SwitchDoc Labs.

I have updated the AM2315 Implementation Guide with the new changes. I also modified the SwitchDoc code so that it will work with Python3.

Now it is time for a rant. If you are a Python programmer, it is time for you to get serious about Python3 if you are still clinging to your Python2.7 worldview. All new code you write should be written in Python3. Python2.7 has an End Of Life date on January 1, 2020. There is a lot of 2.7 code out there that will work in Python3 with just a few changes. In fact, the only changes I made to get the SwitchDoc code to work was putting parenthesis around the print statements. EOR. (End of Rant)

You can download the updated implementation document with a code sample here. Thanks to Adafruit and SwitchDoc Labs for being a part of the Open Source community.