DOTKLOK Revival

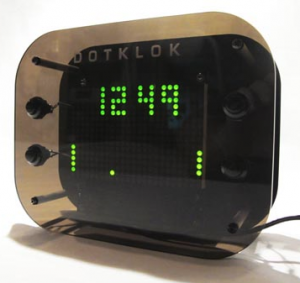
Way back in 2013 a very creative and talented Maker named Andrew O’Malley created the DOTKLOK project. The project has been dormant for a very long time.

Ol’ Sopwith is a long time clock builder and I became fascinated with this project. Why? Several reasons: a really cool set of clock animations including ‘pong’, ‘space-invaders’, and ‘pac-man’, a custom Arduino design that is easy to build from through-hole parts, and excellent documentation.

In 2014, I purchased enough parts to build three DOTKLOKS. The only thing I did not have was the acrylic front and back panels. At that time, Andrew was selling the clock in kit form or assembled. The problem for me, was the cost was beyond what I was willing to pay.

Without the panels, I packed up the parts and stored them in the parts closet with the intention of building an enclosure out of wood when I found the time. Never happened.

Recently, I discovered there are plenty of on-line ‘self-serve’ laser cutting services that can cut the acrylic panels for a DOTKLOK. Although a set costs about $20 USD (ouch), I took the plunge and ordered a set of panels using the provided Inkscape SVG from the project.

Once the panels arrived, I created a ‘prototype’ DOTKLOK. When I loaded up the Arduino code version 1.5 into the Arduino development GUI, I quickly discovered the code failed compilation with dozens of errors. It seems the Arduino API has changed considerably over the last five years. No surprise.

After a fair amount of research and effort, I was able to upgrade the code and get a clean compile. I uploaded it to the DOTKLOK prototype and it fired right up. Oh the joy. There are still some problems with the code in some of the animations, but I will fix those soon.

As I always do, I decided to hack the original DOTKLOK design to make it better. The aluminum standoffs are ugly and Andrew used two of them stacked together to get the right length. I also want to use shorter standoffs to make the clock “thinner.”

I ordered black aluminum standoffs (metric) and matching screws from AliExpress (China). They should arrive in a couple of weeks. I also discovered the Sure LED arrays used in the project are still available from a few sources, but only available in red.

I will publish all of my work on the DOTKLOK revival project soon. If you are interested in purchasing a kit or assembled DOTKLOK, let me know. I will consider making them available.

Thanks again to Andrew O’Malley for creating such a cool project.

Sopwith


Your Robot Can Do What?

I have always been interested in robots since I was a kid. “Lost In Space” was one of my favorite TV shows in the 60’s, and the show had a very cool robot.

(Photo attribution)

I must admit I do not spend a lot of time hacking robots, although the Maker space is ripe with opportunities. The Raspberry Pi and Arduino universe is over-run with cool robotic gadgets.

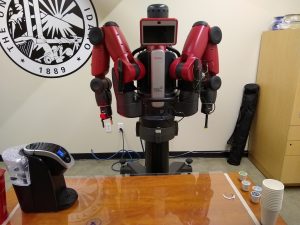
When I was touring the University of Idaho robotics lab with Dr. John Shovic last month, he introduced me to one of the labs’ robots named “Baxter.” (John likes to keep things simple.)

Baxter

When I asked John what Baxter could do, he said, “He makes a great cup of coffee.”  No wait – what? Now I know there are lots of robots that do some cool stuff. There is one that cleans your floors. There are a bunch of Maker robots that can follow a line, back away from walls, and move through obstacle courses. But make coffee? Now this is cool! Exactly the kind of thing a robot should do!

Here is video of Baxter performing his mastery.

Ol’ Sopwith has great faith in the young generation of robotics students if they continue to teach robots how to do things like this!

Sopwith


About to Enter the 3D Printer World

I know you smoke breathers may find this hard to believe, but Ol’ Sopwith is finally going to enter the universe of 3D printing. I have dragged my feet on this technology for a couple of reasons.

  • I did not want to spend the money. $300 USD 3D printers are cheap and temperamental, and $2500 USD printers are way above what I am willing to pay.
  • I was afraid it would not be useful. (I do not want to waste time printing toy objects.)
  • I did not have the time to invest in learning a whole new technology from the ground up.
  • I did not have space for it.
  • I did now want a noisy, smelly device in my office or workshop.

Time have changed. I have a couple of projects I am working on that could really use the capabilities of a 3D printer. Plus the cost of really good printers has come down and the capabilities have gone up dramatically.

After extensive research, I decided the best printer on the market for price/performance is the Prusa i3 MKS3. The are built in Czechoslovakia by a company founded by Josef Prusa, one of the innovators in the 3D early days.

I ordered the kit version and am expecting it will take about 4 hours to assemble. It should arrive in a couple of days. I will post blog entries about my assembling, testing, and printing experiences so you can follow along.

Stay tuned.

Sopwith

A Visit with Dr. SwitchDoc Labs – John Shovic

I had the great fortune to spend a long Memorial Day weekend in Coeur d’Alene, ID. Anytime I am on the move, I like to check out whom of my acquaintances live in the area so I can buy them a cup of coffee.

On this trip, I struck pay dirt! Dr. John Shovic, the founder of SwitchDoc Labs lives there. I first “met” John virtually, way back in the early Pi days when he wrote for the brand new PiMag.

He wrote a series of articles about his adventures building a Pi based weather station and mounting it on a Ham radio tower in the remote Caribbean island of Curacao. I was fascinated with his story and followed it closely. Only John would be crazy enough to come with this idea – and then act on it.

For those who are interested in reading his articles, I have included the download links to the magazines below:

John was kind enough to meet me at the beautiful Coeur d’Alene Innovation Den and show me around. John has his robotics lab here and he spends most of his time with his students from the University of Idaho where he teaches. Many of you know John by following his endless projects and innovations at SwitchDoc Labs and his many KickStarter projects.

What a privilege it was for me to be able to spend time with this brilliant, fun, and laid-back man. As I was flying back home thinking about my great holiday, I kept trying to figure out how I was going to keep up with John and all of his cool Maker projects.

I will have more to say about John in future blog posts.

Sopwith

Airplane Fun Revisited


A very long time ago I wrote a blog about tracking airplanes. I was living in London at the time very near London City airport. That project was a lot of fun, so I hacked together another Pi setup to track airplanes here in the Los Angeles area.

I decided to install PiAware and provide my tracker feed to FlightAware. Why? Because if you do, you are given an Enterprise level account (value – $89 USD/month). I fly a lot and use the FlightAware app on my Android phone all the time. It is so easy to track my inbound airplane when I am waiting for a flight.

FlightAware has detailed instructions on how to build a PiAware setup.

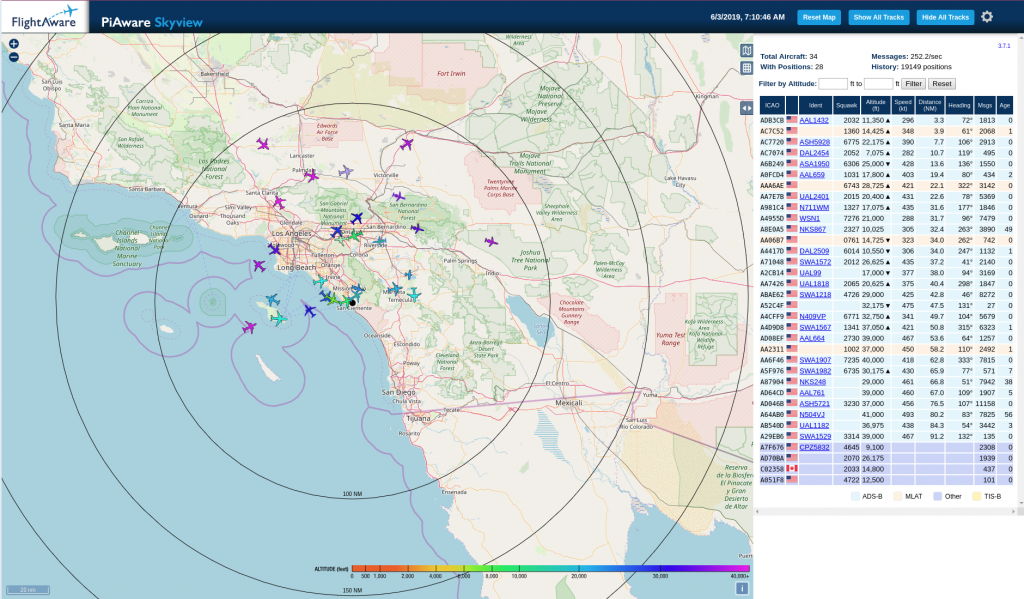
The below image from FlightAware’s web site  shows how many other Makers have blazed this trail before me. That is a lot of Raspberry Pi’s folks.

For my setup I used the below components:

  1. Raspberry Pi3 B+
  2. Pi case with cooling fan
  3. RTL-SDR UBS dongle (This is what receives the radio signals from the antenna)
  4. An extended range WiFi adapter (USB)
  5. A FlightAware optimized antenna

Putting it all together was a snap. To install the software, follow the detailed instructions on the FlightAware web site.

Continue reading