
In Part-I and Part-II of this blog series, I assembled the terrific NatureBytes Camera Kit and mounted it on a tripod. I had to wait for parts to arrive before I could add night-vision to the kit. This blog post shows how I modified the camera kit so it can see in the dark.
The goal was to somehow mount and power the LISIPAROI IR light board while still maintaining the weather-proof integrity of the NatureBytes camera kit. The night-vision hack turned out to be pretty simple.
I found a small plastic box with a latching lid in the office supply aisle at a local Wal-Mart. It was designed to store paper clips on a desk, but Ol’ Sopwith had other ideas. The box was the perfect size to install a battery pack, trigger wire and IR light board.
Using 2 – 3m nylons bolts, I mounted the IR light ring to the inside of the lid. I then wired up a square 4-AA battery box with a Dupont connector to power the IR light board. (I used rechargeable 1.2V AA batteries). I next added a twisted pair of wires from the IR light board, through the bung in the back of the camera to the GPIO pins of the Raspberry Pi. Instead of puncturing the bung, I ran the wires along the edge into the back of the camera case.
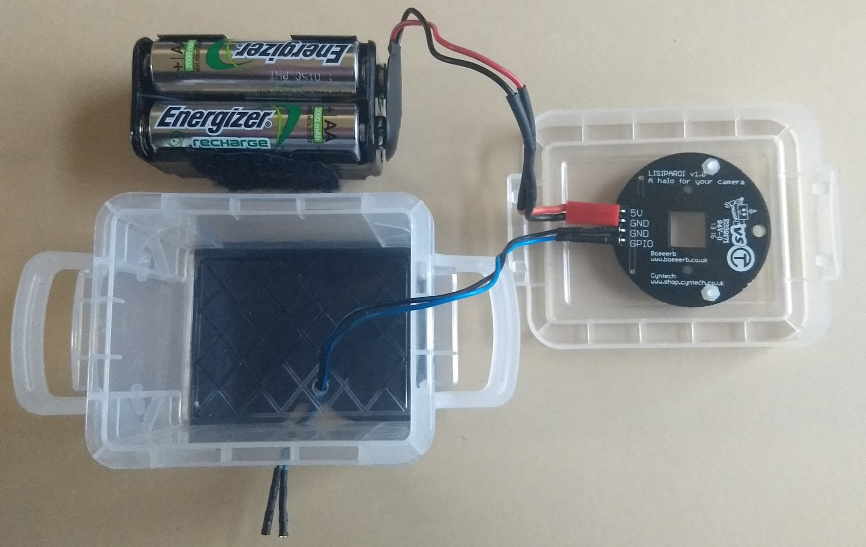
The IR light board has 4 (four) connector pins. Two of them power the board; a 5V DC pin and a ground pin. The other two pins turn the IR LED’s on and off. One is for ground, and the other is a 3.3V GPIO pin. When this pin is high, the lights come on, when it is low the lights are off. Simple enough.

I wired the GPIO pin and ground to GPIO pins 22 and 20 respectively. Next, I modified the nbcamera.py script provided by NatureBytes in the ~/NatureBytes/Scripts folder. The modifications includes a time window to allow activation of the IR lights since it makes no sense to turn them on during daylight hours. I set the irStartTime variable to 18 (1800 hours), and the irStopTime variable to 6 (0600 hours). It gets dark here in Southern California around 6 PM and the sun rises just before 6 AM.
The modified code creates this sequence of events:
- Wait until the IR motion sensor detects movement.
- If within the IR LED active hour values – turn on infrared lights.
- Start a timer thread that keeps the IR lights on for 10 seconds.
- Take a photo.
- Reset the IR motion sensor.
- When the timer expires – turn off the IR lights.
- GoTo 1.
If you are interested in studying or using the modified script click below:
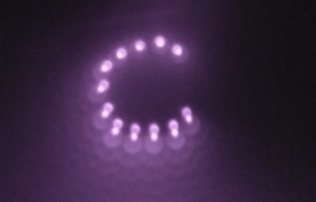
Once the coding was done, I did some testing to make sure it works. One of the challenges with IR LED’s is that the human eye cannot see if they are on or not. Aye’ – but a cell phone camera can! The below photo shows what the lights look like from a camera phone.
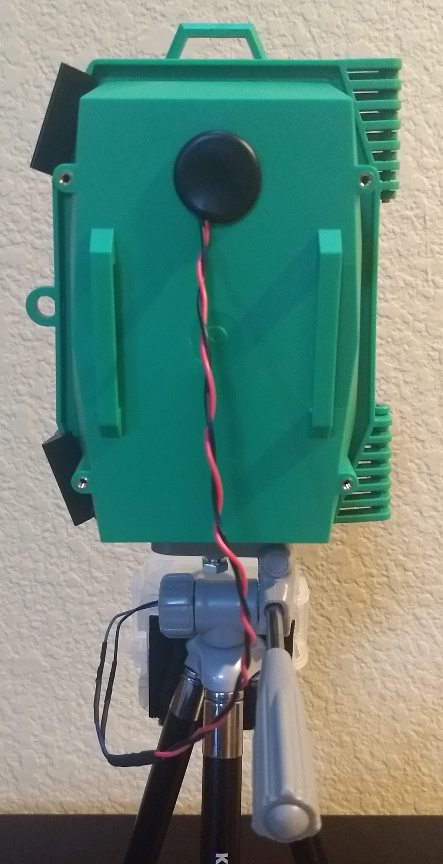
I mounted the IR light package to the tripod, just below the camera box. I used heavy duty Velcro to accomplish this.
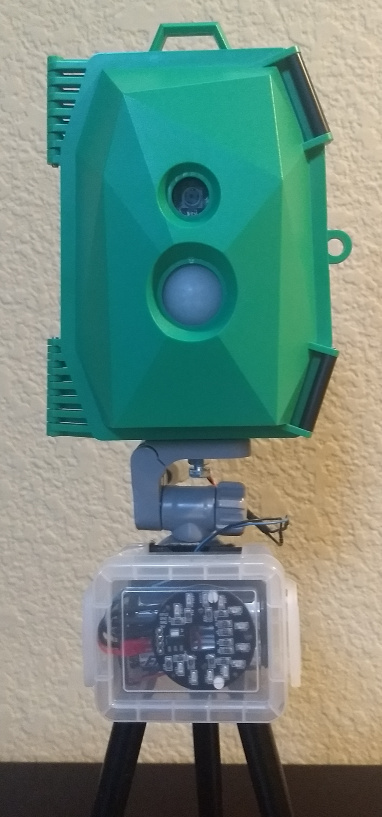
The rig is now complete and ready for the field. Stay tuned for a report on its performance.